Production ProcessPart of the Moving Image class was to create a VFX shot. I decided to create a Star Wars holographic map effect. Below is the process I went through to create the final product. To start I created folders that would contain the various elements. Assets for the planet images, Footage for the video, and Comp for the comps that would be created. I then created a black solid and applied the lens flare preset with a keyframed brightness, and a 105mm lens type. There's also a glow to make it blue. I created a new comp for the planetary images, which I made 3D and moved in z space. I then added a blue fill to them all bar the main planet which I used a tint on. Lastly I created a default camera and adjusted the aperture and blur. I then dropped the HUD comp into the main scene and moved it around, I duplicated it and created a mask with a low opacity to act as a reflection on the TV screen. I repeated this but added more glows and changed the mask to be the same as the triangle mask I had created for the blue fill. I duplicated the main HUD again and moved it over to be a reflection on the glass, this involved roto out the guy in the corner and setting the mask to subtract so that the HUD would be behind him. I then rendered out using Adobe Media Encoder with standard 1080p YouTube settings. The final image shows my file structure. I had four folders, AE for my After Effects project, In for the footage and assets I brought in, Out for the final encoded video, and Process for the screenshots of my work.
0 Comments
A short animation of an eclipse made following a tutorial by PremiumBeat.
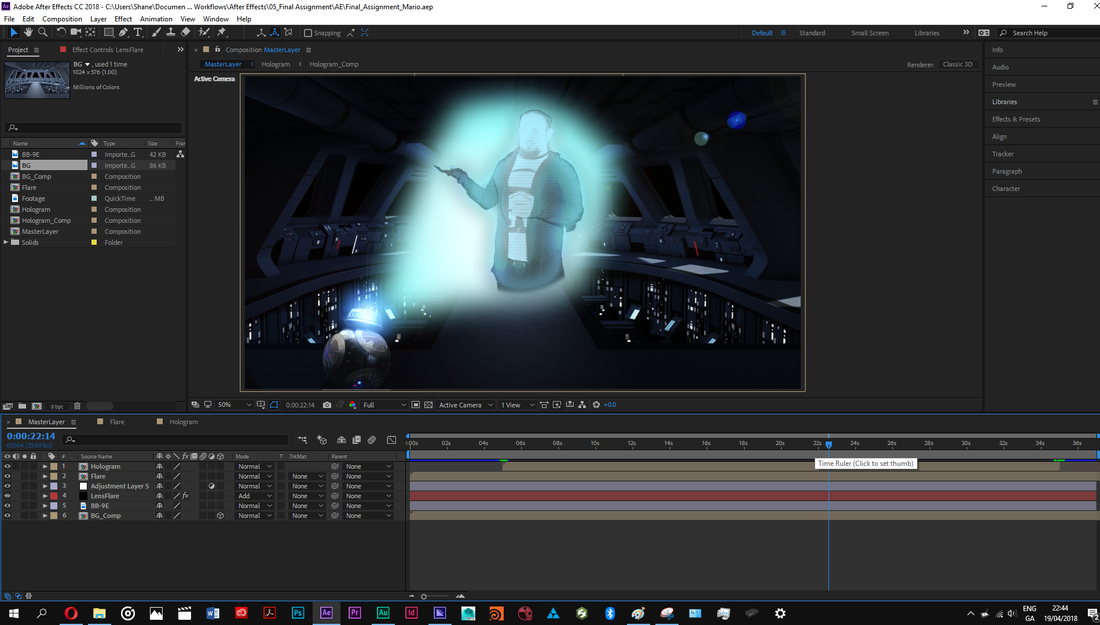
Very heavy with light and took longer than some of my other videos to render. Production ProcessFor my project I filmed myself against a green screen that I would later bring into After Effects and use keylight to remove the green. I also created a mask to remove the lower part of my legs and then feather it out so as not to have a hard line. I lit myself with three lights; two redheads, and a miser. I had filmed a toy of BB-9E against a green screen as well but when using the keylight it wasn’t removing everything and other parts turned orange. I decided in the end to use a still image of BB-9E and keyframe a rotation to give the impression of movement. For the assignment I needed to know how to light a green screen, use Chroma Keying, and how to use After Effects. I used the presets TV Weak – old, and TV Weak – bad, to create the illusion of a hologram. I precomposed my footage, applied the presets, added an adj layer, and added a glow and tint to each layer. In the main comp layer, I dropped the other comps in, brought in a background image, and an image of BB-9E. For some of the TV setting layers, I deleted the wave warp and the box blur. I had no issues with my workflow, it all went smoothly. Before I starting the project, I set up four folders, 3D, AE, In, and Out. The 3D folder was for my chess piece that I would bring in and make a hologram as well. I rendered out a png sequence with a camera rotation. The AE folder was for my project file. The In folder was for non 3D files I brought in, such as my video footage and images. Finally, my Out folder was for the video files I exported from AME. For exporting I sent the comp to Adobe Media Encoder and used the codec/preset: H.264 – YouTube 1080P HD My footage took roughly fifteen minutes to render from AME, which was surprising as usually when I render it would take around an hour. To alter my voice, I the footage into Adobe Audition and added two effects, pitch shifter, and distortion. Comping assets to create a flyby of a UFO on top of a cityscape background.
The main part of the new electricity effect from Video Copilot. This involved a lot of exposure, linear wipe, and solid composite effects.
|
SynopsisVarious effects I've created in After Effects. Archives
June 2019
Categories |


 RSS Feed
